Blog

  • How to Start a Micro-Yard Work Business (Weeding, Raking, etc.)

    How to Start a Micro-Yard Work Business (Weeding, Raking, etc.)


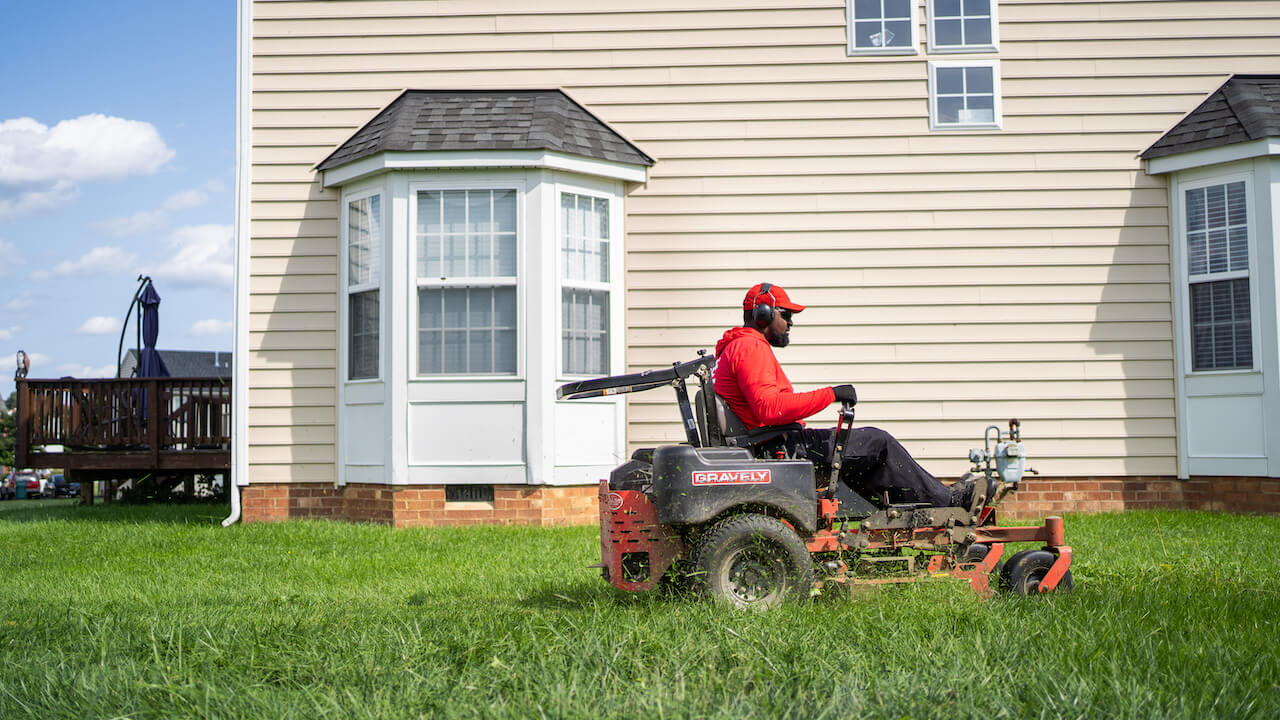
    Turn outdoor chores into cash! Learn how to start a micro-yard work business (weeding, raking, etc.) with this simple step-by-step guide for teens.

    If you are looking for a simple way to earn money outdoors, this guide on how to start a micro-yard work business (weeding, raking, etc.) is for you. You do not need expensive equipment or a large crew. You just need energy, a few basic tools, and a willingness to get your hands dirty. Many homeowners need help with small tasks they dislike or cannot do. By offering these services, you fill a need and earn cash. Let us walk through the process of launching your own business.

    What is a Micro-Yard Work Business?

    A micro-yard work business focuses on small, manageable tasks. You are not mowing vast lawns with a riding mower. Instead, you handle the details. This includes weeding flower beds, raking leaves, sweeping driveways, and planting small flowers.

    These jobs are perfect for teens. They require manual labor but not heavy machinery. You can complete them in a few hours and move on to the next client. It is a flexible, scalable way to work. Learning how to start a micro-yard work business (weeding, raking, etc.) puts you in control of your own schedule.

    Why Focus on Micro Tasks?

    Homeowners often neglect these small jobs. They might not own the right tools. They might have bad backs or busy schedules. By offering to handle these specific tasks, you become a hero.

    Weeding, for example, is a never-ending battle for gardeners. Raking leaves in the fall is a massive chore. These tasks are too small for big landscaping companies but too big for busy people to ignore. You fill that gap perfectly. This is the core opportunity in how to start a micro-yard work business (weeding, raking, etc.).

    Step 1: Gather Your Essential Tools

    You do not need a truck full of gear. Start with the basics. A good pair of gardening gloves protects your hands from blisters and thorns. A hand trowel is essential for digging out stubborn weeds.

    You will need a rake for leaves and debris. A sturdy pair of pruning shears helps trim back overgrown plants. For clean-up, bring a broom and a dustpan. Finally, have heavy-duty trash bags for collecting waste. Starting with these simple tools keeps your costs low. It is the first practical step in how to start a micro-yard work business (weeding, raking, etc.).

    Step 2: Know Your Services

    Be specific about what you offer. This clarity helps customers understand your value. Your list might include:

    • Weeding: Removing unwanted plants from garden beds and walkways.
    • Raking: Clearing leaves from lawns and gathering them into piles or bags.
    • Mulching: Spreading fresh mulch to make gardens look neat.
    • Trimming: Cutting back small bushes and shrubs.
    • Sweeping: Cleaning driveways, patios, and sidewalks.

    You can add or remove services based on the season. Offering a clear menu makes you look professional. It is a key part of how to start a micro-yard work business (weeding, raking, etc.).

    Step 3: Set Your Pricing

    Pricing for micro tasks can be based on time or by the job. For weeding, you might charge an hourly rate. For raking an entire yard, a flat fee might work better.

    Research local rates. A typical range for this type of work is $20 to $40 per hour, depending on your area . Start on the lower end to attract your first clients. Once you have experience and reviews, you can raise your rates. Be transparent with customers about how you calculate your price. Fair pricing builds trust.

    Step 4: Find Your First Customers

    Start close to home. Knock on your neighbors’ doors. Introduce yourself and explain what you offer. Hand them a simple flyer with your name, services, and phone number.

    You can also post in local community Facebook groups or on Nextdoor. Ask your parents to share your services with their coworkers and friends. Word of mouth is powerful. A satisfied customer will often refer you to their neighbors. Finding clients is the active part of how to start a micro-yard work business (weeding, raking, etc.).

    Step 5: Create a Simple Flyer

    A flyer does not need to be fancy, but it must be clear. Use a bold headline like “Teen Yard Worker Available!” List your services in bullet points. Include your rates or say “Affordable rates, ask for a quote.”

    Add a photo of yourself (optional) and your parent’s phone number for contact. Print them on colorful paper so they stand out on bulletin boards. Post them at the local library, community center, and grocery store. Flyers are a low-tech but effective marketing tool.

    Step 6: Master the Art of Weeding

    Weeding is a skill. You need to remove the root, not just the top. If you leave the root, the weed grows back quickly. Use your hand trowel to dig down and loosen the soil around the root.

    Pull slowly and steadily. If the root breaks, try to remove the rest with your tool. After weeding, clear away all the debris. A clean bed looks instantly better. Your attention to detail will impress clients. Mastering this task is central to how to start a micro-yard work business (weeding, raking, etc.).

    Step 7: Raking Like a Pro

    Raking seems simple, but doing it efficiently saves time. Use a fan rake for leaves on the lawn. Rake with the grain of the grass to avoid damaging it. Make piles, then use a tarp to drag the leaves to the curb or bag them.

    For large areas, work in sections. Finish one area completely before moving to the next. This prevents you from spreading leaves back onto clean spots. A tidy, leaf-free lawn makes a great first impression.

    Step 8: Safety First

    Working outdoors comes with risks. Always wear gloves to protect against thorns and sharp objects. Wear a hat and sunscreen to avoid sunburn. Drink plenty of water, especially on hot days.

    Be aware of your surroundings. Watch for insects like bees and wasps. If you are using any tools, handle them carefully. Your safety is more important than any job. Parents will appreciate that you take these precautions seriously. It is a vital part of how to start a micro-yard work business (weeding, raking, etc.).

    Step 9: Communicate with Clients

    Before you start, confirm exactly what the client wants. Ask them to show you the areas they want weeded or raked. Clarify where they want the waste placed. Do they want it bagged for trash? Dumped in a compost pile?

    During the job, if you have questions, ask. It is better to check than to do something wrong. After finishing, show the client the completed work. Ask if they are satisfied. Good communication prevents misunderstandings and leads to repeat business.

    Step 10: Deliver Quality Work

    Your reputation is everything. Take pride in your work. Do not rush and leave a mess behind. If you promise to weed a garden, make sure every visible weed is gone. If you rake leaves, leave the lawn spotless.

    Go the extra mile. Sweep the walkway after you finish. Neatly stack any tools you moved. These small touches show you care. They turn a one-time customer into a regular client. Quality work is the best marketing there is.

    Step 11: Handle Payments Professionally

    Decide how you will accept payment. Cash is easiest for most small jobs. Apps like Venmo or PayPal are also popular, but ensure your parent helps manage the account if you are under 18.

    Give the client a receipt if they ask for one. A simple handwritten note is fine. Keep track of your earnings in a notebook. This helps you see how much you are making and is useful if you need to pay taxes on your income later.

    Step 12: Expand Your Services Over Time

    Once you master the basics, think about adding more. You could offer to plant flowers for spring. You could offer to spread mulch or soil. You could even offer pressure washing for driveways (with adult supervision).

    Adding services allows you to earn more from each client. It also keeps your business interesting throughout the year. Seasonal expansion is a smart growth strategy. It shows you have mastered how to start a micro-yard work business (weeding, raking, etc.) and are ready for more.

    Step 13: Ask for Reviews and Referrals

    After a successful job, ask the client if they would be willing to recommend you to friends. Word-of-mouth referrals are gold in a local service business. You can also ask them to leave a review on your social media page or Google listing.

    Consider offering a small discount to clients who refer new customers to you. A “refer a friend and get $5 off your next service” deal encourages them to spread the word. Happy customers are your best salespeople.

    Step 14: Manage Your Time

    Balancing work with school and social life requires planning. Do not overbook yourself. Only take on as many jobs as you can handle without rushing.

    Use a calendar to schedule your jobs. Block out time for homework and rest. If you are too tired, your work quality drops. Managing your time well ensures you enjoy your business instead of dreading it. It is a life skill that extends beyond yard work.

    Conclusion

    Starting a micro-yard work business is a fantastic way for teens to earn money and learn responsibility. It requires simple tools, hard work, and good communication. By focusing on small tasks like weeding and raking, you provide real value to your neighbors. You build a reputation and a customer base one yard at a time.

    For more tips on managing your small business and tracking your earnings, be sure to visit evdrivetoday.com. We have resources to help you grow from a beginner to a pro.

    Now, we want to hear from you! Have you tried starting a yard work business? What tips would you add? Drop a comment below and share your experience with our community.

  • 7 Steps to Getting Started with Freelance Graphic Design (No Degree Needed)

    Are you getting started with freelance graphic design? This active guide covers building a portfolio, finding clients, and pricing your work—no degree required.

    Introduction

    If you are getting started with freelance graphic design, you might worry that not having a degree will hold you back. The truth is, the creative industry in 2025 cares more about your portfolio and skills than your formal education . Many successful designers are self-taught and built their careers through online learning and practical experience.

    This guide will walk you through the exact steps to launch your freelance career today. We will cover everything from learning the tools to landing your first paying client. The path is straightforward if you follow a clear plan. Let us dive into how you can begin getting started with freelance graphic design without spending years in a classroom.

    Step 1: Master the Right Tools (Without Breaking the Bank)

    Before you find clients, you must learn the software. When getting started with freelance graphic design, focus on industry-standard tools that employers and clients expect you to know.

    Start with Canva for Beginners

    Canva is the perfect entry point. It is user-friendly and helps you understand basic design principles like layout, alignment, and typography . Many small businesses actually prefer Canva designers because the files are easy to edit later. You can create social media graphics, flyers, and presentations quickly.

    Graduate to Adobe Photoshop and Illustrator

    To command higher rates, you need professional software. Adobe Photoshop is essential for photo editing and manipulation. Adobe Illustrator is the standard for logos and vector graphics . You do not need to buy expensive courses. Platforms like YouTube and Skillshare offer thousands of free tutorials. The key is consistent practice.

    Explore Figma for UI/UX Design

    If you are interested in web design, learn Figma. It is a free, browser-based tool that many startups use for interface design. Mastering Figma opens doors to higher-paying UI/UX projects. Remember, when you are getting started with freelance graphic design, your tool proficiency is your ticket to getting hired.

    Step 2: Build a Portfolio That Attracts Clients

    Your portfolio is your resume. When getting started with freelance graphic design, you need to showcase your ability, even if you have no paid experience yet .

    Create Spec Work

    Do not wait for clients to hire you before you have samples. Create fictional projects. Redesign a famous brand’s logo. Design a social media campaign for a fake coffee shop. Build a brand identity for a startup you admire. This demonstrates your creativity and process.

    Volunteer for Nonprofits

    Local charities and community organizations often need design help but have small budgets. Offer to create a flyer or a logo for free. This gives you a real project to add to your portfolio and a testimonial to use later. It is a win-win when you are getting started with freelance graphic design and need real-world examples.

    Show Your Process

    Do not just post the final image. Include sketches, mood boards, and explanations of your design choices. Clients want to see how you think and solve problems . A portfolio that tells a story is far more impressive than a collection of pretty pictures.

    Step 3: Find Your First Freelance Clients

    Once your portfolio is ready, you need to find work. Getting started with freelance graphic design means putting yourself out there consistently.

    Use Freelance Platforms

    Platforms like Upwork and Fiverr are great for beginners . They allow you to create a profile, set your rates, and apply for jobs. Start with smaller projects to build reviews and ratings. Positive feedback on these sites helps you win larger contracts later . Be prepared to write personalized proposals that show the client you understand their project.

    Leverage LinkedIn and Social Media

    Update your LinkedIn profile to highlight your new skills. Post your work regularly on Instagram and Pinterest. Use relevant hashtags so potential clients can find you. Join Facebook groups for small business owners and offer your services. When getting started with freelance graphic design, your network is your net worth.

    Pitch Directly to Businesses

    Think of local businesses you frequent. Does their menu look outdated? Is their website logo blurry? Prepare a short, friendly email or visit them with a sample of how you could improve their branding. This proactive approach often lands your first few clients.

    Step 4: Price Your Services Correctly

    Pricing confuses many beginners, but it is critical for sustainability. Getting started with freelance graphic design requires a strategy that pays you fairly without scaring clients away .

    Calculate Your Base Rate

    Do not guess your prices. Calculate them based on your expenses. Add up your monthly bills, divide by the hours you want to work, and factor in taxes and savings . For example, in the UK, beginner freelance graphic designers often charge between £20 and £30 per hour, while more complex projects like logos range from £200 to £1,500 .

    Choose a Pricing Model

    • Hourly Pricing: Best for projects with an unclear scope or ongoing maintenance.
    • Project-Based Pricing: Ideal for defined projects like a logo or a brochure. This sets clear expectations for the client upfront .
    • Value-Based Pricing: Once you gain experience, charge based on the value you bring. If your design helps a client make $10,000, you can charge more than an hourly rate .

    Never Undervalue Yourself

    Many new designers set prices too low to attract clients. This leads to burnout and attracts difficult clients who do not value your work. Research market rates and price yourself competitively, but fairly .

    Step 5: Create a Foolproof Contract

    Before you start any project, get a signed contract. It protects you and the client. When getting started with freelance graphic design, a contract is your best friend .

    What to Include in Your Contract

    • Scope of Work: List exactly what you will deliver (e.g., “one logo design with three initial concepts and two rounds of revisions”) .
    • Payment Terms: Specify the total cost, the deposit amount (usually 30-50% upfront), and the due date for final payment .
    • Revision Limits: Clearly state how many changes are included. This prevents “scope creep,” where clients keep asking for endless tweaks .
    • Cancellation (Kill Fee): If the client cancels the project midway, a kill fee ensures you are paid for the work you have already completed .

    Using a template from sites like OneSuite can help you customize a professional agreement quickly .

    Step 6: Master Client Communication

    Technical skills are only half the battle. Soft skills determine if clients rehire you. When getting started with freelance graphic design, learn to communicate clearly.

    Set Expectations Early

    Tell clients your process upfront. Explain how you will deliver drafts, how they should give feedback, and how long revisions take. This prevents misunderstandings.

    Ask the Right Questions

    At the start of a project, ask detailed questions. What is the goal of this design? Who is the target audience? Do you have examples of styles you like? The more information you gather, the fewer revisions you will need .

    Handle Feedback Gracefully

    Not all feedback will be positive. Learn to separate your ego from your work. Ask clarifying questions to understand what the client wants to change. A collaborative attitude builds long-term relationships .

    Step 7: Continuously Improve Your Skills

    The design world changes fast. To stay relevant, you must keep learning. Getting started with freelance graphic design is just the beginning; growing your skills ensures you can raise your rates over time.

    Follow Design Trends

    Stay updated on trends like accessible design, dark mode aesthetics, and the blend of flat and 3D graphics . Clients often look for designers who know what is current.

    Seek Certifications

    While you do not need a degree, certifications add credibility. Consider the Google UX Design Certificate on Coursera or becoming an Adobe Certified Professional . These badges on your LinkedIn profile signal competence to potential clients.

    Learn from Feedback

    Every project teaches you something. After finishing a job, ask the client what they loved and if there was anything they wished was different. Use this insight to improve your next project.

    Common Mistakes to Avoid

    • Skipping the Contract: A verbal agreement is not enough. Always get it in writing .
    • Undercharging: It is harder to raise prices later than to start with fair rates. Low prices also attract difficult clients .
    • Ignoring Taxes: Set aside a percentage of every payment for taxes. Use tools like Wise to manage international payments and track earnings efficiently .
    • Not Specializing: Trying to be a generalist makes marketing harder. Specializing in one area, like logo design or social media graphics, helps you stand out.

    Conclusion

    Getting started with freelance graphic design is an achievable goal without a formal degree. By mastering the tools, building a strong portfolio, and learning how to manage clients professionally, you can create a thriving business. The demand for creative skills is booming, and companies are ready to hire talent based on ability, not credentials . Take it one step at a time, stay consistent, and do not be afraid to put your work out there. For more detailed guides, resources, and tools to build your freelance business, visit evdrivetoday.com.

    Now it is your turn! What area of graphic design excites you the most? Are you leaning towards logo design, social media content, or maybe UI/UX? Share your goals in the comments below. Let us support each other on this creative journey

  • 7 Steps to Create and Sell Digital Printables on Etsy

    7 Steps to Create and Sell Digital Printables on Etsy

    Learn how to create and sell digital printables on Etsy with this active guide. Discover design tips, listing strategies, and marketing ideas to boost your shop today.

    Introduction

    If you want to create and sell digital printables on Etsy, you have chosen one of the most profitable online business models available today. This process does not require inventory, shipping, or a large upfront investment. You simply design a file, upload it, and earn money while you sleep. Many beginners feel overwhelmed by the technical side, but this guide breaks it down into simple, actionable steps. We will walk through everything from finding your niche to marketing your products effectively. By the end, you will have a clear roadmap to launch your own successful shop. Remember, the goal is to create and sell digital printables on Etsy efficiently, so let us dive straight into the first step.

    Why You Should Create and Sell Digital Printables on Etsy

    The demand for instant digital products continues to rise because buyers love immediate gratification. When you create and sell digital printables on Etsy, you cater to a global audience searching for planners, art, and educational materials. The startup costs are minimal compared to physical products, making it accessible for anyone with a computer and an idea. Furthermore, Etsy already has millions of monthly visitors actively looking for printables, which means you do not need to build your own traffic from scratch. This platform handles the heavy lifting of customer acquisition, allowing you to focus on creating quality items. It is a low-risk, high-reward venture that fits perfectly around a full-time job or family commitments.

    Step 1: Find Your Profitable Niche

    Before you open design software, you must decide what type of printables you will sell. To successfully create and sell digital printables on Etsy, you need a specific target audience. Do not try to be everything to everyone. Instead, focus on niches like wedding planners, teacher resources, budgeting worksheets, or wall art. Researching current trends on Etsy itself is the best way to validate your idea. Type keywords like “digital planner” or “wall art printable” into the search bar and observe what comes up. Look at the bestsellers in those categories and read their reviews. This tells you exactly what customers want and what they feel is missing. A focused niche makes it easier to market your products and build a loyal customer base.

    Step 2: Design High-Quality Products

    Once you have your niche, it is time to create the actual files. You do not need to be a professional graphic designer to create and sell digital printables on Etsy. Tools like Canva, Adobe Express, or even Microsoft PowerPoint are perfect for beginners. Start by sketching your ideas on paper, then translate them into a digital format. Ensure your designs are visually clean, functional, and easy to read. Pay close attention to the dimensions; standard sizes like 8.5″ x 11″ (Letter size) or A4 are popular because they are easy for customers to print at home. Remember, the quality of your design reflects directly on your brand. If you are unsure about your skills, look for templates you can customize. The key is to offer value that solves a problem or beautifies a space for the buyer.

    Step 3: Save and Organize Your Files Correctly

    After finishing your design, saving it correctly is crucial. When you create and sell digital printables on Etsy, you usually deliver a PDF file because it preserves formatting across different computers and operating systems. Save your final design as a high-resolution PDF (print quality) and also keep an editable master copy for yourself in case you need to make changes later. Name your files clearly, using keywords that describe the product, such as “Floral-Budget-Planner-2025-Printable.pdf.” Avoid generic names like “final draft.” Proper file organization on your computer will save you hours of frustration when you have dozens of products. You should also create a mockup folder to store lifestyle images of your products, which we will discuss next.

    Step 4: Create Stunning Product Listings

    Your listing is your storefront, and it must attract clicks. To effectively create and sell digital printables on Etsy, you need high-quality mockups. A mockup is a photo that shows your printable in a real-life setting, like on a desk or in a frame. You can create these using Canva or purchase mockup templates from other Etsy sellers. Your listing should include at least five images: a main cover photo, a zoomed-in detail shot, a photo showing the printable in use, an image of the included files, and a photo with a brief description of the product. The main photo is the most important, as it determines whether someone clicks on your listing among hundreds of search results. Make it bright, clear, and appealing.

    Step 5: Optimize Your Titles and Tags

    Etsy is a search engine, just like Google. To get found, you must use the right keywords. Your primary goal is to create and sell digital printables on Etsy, but buyers use different phrases to find them. They might search for “weekly meal planner,” “baby shower bingo,” or “minimalist art print.” Use all 13 tags that Etsy allows and fill your title with descriptive keywords. For example, instead of just “Weekly Planner,” use “Weekly Meal Planner Printable, Grocery List Template, Food Prep Organizer, A4 and Letter Size.” This strategy increases your chances of appearing in various search queries. Always think like your customer: what would they type into the search bar? You must include your main keyword phrase, “create and sell digital printables on Etsy,” in your listing description as well, naturally.

    Step 6: Set Up Your Shop Policies and Pricing

    Pricing your printables correctly is a balancing act. You want to be competitive, but you also need to value your time. When you create and sell digital printables on Etsy, your costs are time, software subscriptions, and Etsy fees. Look at what other sellers in your niche are charging. If you are a new shop, it is okay to price slightly lower to get initial reviews, but do not undervalue your work. A price range of $3 to $15 is common for single printables, while bundles can sell for $20 or more. Also, write clear shop policies regarding refunds. Because these are digital files, you can state that you do not accept refunds due to the nature of the product, but you will help customers if they have technical issues. Clear policies build trust with your buyers.

    Step 7: Market Your Shop to Drive Traffic

    Etsy will send you some traffic, but you should also drive your own. After you create and sell digital printables on Etsy, you need to tell people about it. Pinterest is the best free marketing tool for digital products. Create eye-catching pins that link directly to your listings. Instagram and TikTok are also great for showing behind-the-scenes content of your design process. Consider starting an email list to notify customers about new products and sales. You can also collaborate with influencers or bloggers in your niche. For example, you can reach out to a parenting blogger if you sell kids’ activity sheets. The more places you show up, the more sales you will make.

    Common Mistakes to Avoid

    Many new sellers fail because they skip crucial steps. When you create and sell digital printables on Etsy, avoid these common pitfalls:

    • Ignoring Mobile Users: Most Etsy shoppers browse on their phones. Ensure your listing photos are clear even on a small screen.
    • Poor Quality Control: Always double-check your files for spelling errors, broken links, or formatting issues before uploading.
    • Copying Others: Do not directly copy another seller’s work. Find inspiration, but create your own unique designs. Originality is what builds a strong brand.
    • Setting and Forgetting: A successful shop requires regular updates. Add new products consistently and refresh old listings with better photos or keywords.

    Conclusion

    Learning how to create and sell digital printables on Etsy opens up a world of creative and financial opportunity. It allows you to turn your ideas into income with minimal risk. The journey requires patience, research, and a willingness to learn from feedback, but the rewards are well worth the effort. Start by validating one good idea, design it beautifully, and optimize your listing for search. Then, repeat the process. Over time, your shop will grow into a passive income stream that supports your lifestyle. For more detailed guides, tools, and resources to build your online business, be sure to visit evdrivetoday.com.

    Now it is your turn! What type of printables are you most excited to create? Are you leaning towards planners, art prints, or maybe educational games? Share your niche idea in the comments below—I would love to hear what you are working on and help you get started!

  • The Best Apps for Getting Paid for Odd Jobs (TaskRabbit, etc.)

    The Best Apps for Getting Paid for Odd Jobs (TaskRabbit, etc.)


    Looking for flexible work? Discover the best apps for getting paid for odd jobs (TaskRabbit, etc.) and start earning money on your own schedule today.

    If you want to earn money on your own terms, you need to know about the best apps for getting paid for odd jobs (TaskRabbit, etc.). These platforms connect you with people who need help with everything from assembling furniture to walking dogs. You set your own hours, choose the jobs you want, and get paid directly through the app. It is flexible work that fits around your school or family schedule. This guide explores the top platforms, how they work, and which ones are best for different skills and situations.

    What Are Odd Job Apps?

    Odd job apps are online marketplaces. They connect “taskers” or “gig workers” with clients who need specific tasks completed . These tasks range from simple errands like grocery shopping to skilled work like furniture assembly or plumbing repairs. The apps handle the payment, provide some level of vetting, and offer a platform for communication.

    For workers, these apps offer freedom. You decide when you work and what jobs you accept. For clients, they offer convenience and access to vetted help. Understanding this ecosystem is the first step to using the best apps for getting paid for odd jobs (TaskRabbit, etc.) effectively.

    TaskRabbit: The Original Gig App

    TaskRabbit pioneered the odd job app space. Founded in 2008 and now owned by IKEA, it operates in over 50 cities worldwide . The platform connects “Taskers” with clients who need help with over 35 different service categories .

    How TaskRabbit Works for Workers

    To become a Tasker, you must be at least 18 years old, pass a background check, and provide your Social Security number . In some cities, there is a non-refundable $25 registration fee . You create a profile, list your skills, set your hourly rates, and define your availability.

    When clients search for help, they see Taskers in their area. You receive notifications when someone requests your services. Once you accept, you communicate through the app, complete the job, and get paid. TaskRabbit no longer takes a cut of your earnings, though clients pay a service fee . This makes it one of the best apps for getting paid for odd jobs (TaskRabbit, etc.) for maximizing your income.

    What Services Can You Offer?

    TaskRabbit offers incredible variety. Popular categories include furniture assembly, moving help, cleaning, handyman work, and even virtual services like writing or design . IKEA’s ownership means furniture assembly is particularly in demand . You can specialize in areas where you have skills or try different tasks to see what you enjoy.

    Earning Potential on TaskRabbit

    According to Glassdoor, the average hourly pay for Taskers in the U.S. is $48, though this varies by location and task type . You set your own rates, so your earning potential depends on your skills, reliability, and how you market yourself. Tips are yours to keep 100% .

    Thumbtack: For Skilled Professionals

    Thumbtack operates differently from TaskRabbit. It functions as a bidding marketplace where clients post projects and professionals submit quotes . With over 1,100 service categories, it covers everything from plumbing to photography .

    How Thumbtack Works

    Clients describe their project, and relevant professionals receive the opportunity to bid. Workers pay for “leads” using credits, which cost around $1.42-$1.50 each . This means you pay to connect with potential clients, not just for completed jobs. Lead costs vary by job value and location. Plumbing leads might cost around $20, while larger renovation projects can run $50-$100 per lead .

    Who Should Use Thumbtack?

    Thumbtack works best for licensed professionals and specialists . If you have certifications in areas like electrical work, personal training, or event planning, this platform can connect you with serious clients. The platform requires criminal background checks and maintains licensing verification . It is ideal for skilled workers who want to build a client base.

    Handy: Focused on Home Services

    Handy specializes in home cleaning and handyman services with standardized pricing . Owned by Angi since 2018, it offers a streamlined booking process for clients and consistent work for providers.

    The Handy Platform

    Unlike TaskRabbit where you set rates, Handy sets flat rates for services . In San Francisco, a two-hour cleaning runs $72 for monthly service . Furniture assembly is $45 per hour, and TV mounting is $60 per hour . Professionals receive $15-$22 per hour in major metro areas, depending on ratings and work volume .

    Requirements for Workers

    Handy requires background checks and skills verification for specialized tasks . Workers are independent contractors, not employees. The platform operates in 28 cities across the US, Canada, and UK . If you enjoy cleaning or simple home repairs, Handy deserves consideration among the best apps for getting paid for odd jobs (TaskRabbit, etc.).

    J4T: Built Specifically for Teens

    J4T (Job for Teens) is designed exclusively for young workers. It connects teenagers with adults who need help with chores and tasks .

    How J4T Works

    Adults post tasks like yard work, house cleaning, grocery shopping, babysitting, or dog walking . Teens in the local area can see these postings and apply. The app handles communication and secure payment. It emphasizes safety and trust, making it suitable for younger workers .

    Why J4T Stands Out

    Unlike mainstream gig apps that require workers to be 18, J4T welcomes motivated teenagers. It gives young people a chance to earn money while learning responsibility . For parents and adults, it offers affordable help from vetted local teens. This focus on the teen demographic makes it unique among the best apps for getting paid for odd jobs (TaskRabbit, etc.).

    Funngro: Teenlancing for Digital Natives

    Funngro targets teens aged 14-22 who want to work on digital projects for real companies . Created by educators and tech professionals, it offers “teenlancing” opportunities in areas like social media, meme creation, and product testing .

    The Funngro Experience

    Teens browse projects from companies, apply for those matching their interests, and complete paid work. They earn real money, receive certificates, and build professional experience . The app also teaches money management skills, helping young workers handle their earnings responsibly.

    Skills You Can Develop

    Funngro covers categories like social media management, content creation, and product testing. It helps teens discover their passions while building a professional portfolio. For digitally savvy young people, it represents a modern approach to earning.

    Rosen: Global Micro Jobs with Crypto Payments

    Rosen takes a different approach. Available in over 150 countries, it uses AI translation and stablecoin payments to connect workers with global micro jobs .

    How Rosen Works

    Users join communities based on skills and interests. They discover micro-tasks like short surveys, product feedback, or simple content actions . AI-powered translation lets everyone communicate in their own language. Completed tasks earn USDC stablecoin, with zero transfer fees and near-instant settlement .

    Who Should Use Rosen

    Rosen targets Gen Z digital natives, particularly in emerging markets . It removes language and currency barriers, letting anyone with skills participate in the global economy. For tech-savvy teens interested in crypto and global work, Rosen offers an innovative option.

    Pineapple Jobs: A Teen-Developed Solution

    Pineapple Jobs was created by a 13-year-old student in New Zealand who wanted to earn money for a fishing rod . With help from his web designer mother, he developed a web app connecting local teens with odd jobs.

    The Pineapple Jobs Model

    The app lists opportunities like lawn mowing, car cleaning, babysitting, and gardening . Adults post tasks, and nearby teens can apply. It started in Hāwea, New Zealand, but has attracted interest from other regions. Future updates will include ratings, payments, and messaging features .

    Why It Matters

    Pineapple Jobs demonstrates that teens can both create and use gig platforms. It highlights the demand for local, teen-friendly work opportunities. As it expands, it may become one of the best apps for getting paid for odd jobs (TaskRabbit, etc.) for young workers in New Zealand.

    Traditional Gig Platforms with Odd Job Components

    Several established platforms include odd job categories alongside their main services.

    Care.com

    While primarily for childcare and senior care, Care.com also lists pet sitting, house sitting, and tutoring opportunities . It offers background checks and verified reviews. For workers interested in caregiving roles, it provides a reputable platform.

    Amazon Mechanical Turk

    MTurk focuses on microtasks like data validation, content moderation, and surveys . Workers complete small tasks for small payments. It offers complete flexibility since you work entirely at your own pace. However, earnings are typically modest compared to local service gigs.

    Wonolo

    Wonolo (Work Now Locally) connects workers with same-day shifts in warehouses, hospitality, and events . Workers earn $12-$20 per hour with daily payment options. It includes Occupational Accident Insurance and benefits access. For those preferring structured shifts over task-based work, Wonolo offers an alternative.

    Tips for Success on Gig Apps

    Making money on these platforms requires strategy. Here are key tips to maximize your earnings.

    Build a Strong Profile

    Your profile is your marketing. Use a quality photo and write an informative bio highlighting your skills and experience . Link to social media profiles like LinkedIn to demonstrate your background. A compelling profile helps you stand out even if your rates aren’t the lowest.

    Be Flexible and Versatile

    Flexibility is crucial for high earnings . Set rates that make any task worth your time. Be willing to take various jobs to fill your schedule. On-call availability gives you an advantage over other workers .

    Invest in Your Business

    Consider investing in tools or equipment that expand your capabilities. A good set of cleaning supplies, basic tools, or even a truck for moving jobs can qualify you for higher-paying tasks . These investments pay off through better gigs and higher rates.

    Understand Tax Obligations

    Gig workers are independent contractors, responsible for their own taxes . Platforms don’t withhold taxes like employers do. You may need to pay estimated quarterly taxes if gig income becomes substantial . Keep records of your earnings and expenses. Consider consulting a tax professional or using tax software designed for gig workers.

    Age Requirements and Safety Considerations

    Most mainstream gig apps require workers to be 18 or older . TaskRabbit, Thumbtack, Handy, and similar platforms enforce this age requirement strictly. They require ID verification, Social Security numbers, and background checks .

    For younger teens, specialized platforms like J4T, Funngro, and Pineapple Jobs offer alternatives. These apps are designed with younger workers in mind and include appropriate safety features. Always involve parents when signing up for any platform. Never share personal information beyond what the app requires. Meet new clients in public places when possible, and trust your instincts if a situation feels wrong.

    Conclusion

    The gig economy offers incredible opportunities for flexible, independent work. Whether you prefer physical tasks like furniture assembly, digital projects like social media management, or local errands like dog walking, there is a platform for you. From industry leaders like TaskRabbit to teen-focused apps like J4T, the best apps for getting paid for odd jobs (TaskRabbit, etc.) put earning power in your hands.

    Remember to research each platform’s requirements, build a strong profile, and work safely. With the right approach, these apps can provide meaningful income and valuable experience.

    For more resources on managing your gig income and balancing work with other commitments, be sure to visit evdrivetoday.com. We offer guides to help you succeed in the modern workforce.

    Now, we want to hear from you! Have you tried any of these apps? Which ones worked best for you? Drop a comment below and share your experience with our community.

  • 7 Steps to How to Become a Virtual Assistant as a Student

    Meta Description: Learn how to become a virtual assistant as a student with this active guide. Discover flexible jobs, skills, and tools to earn while you study.

    A student working on a laptop in a university library with a notebook and coffee, illustrating how to become a virtual assistant as a student while balancing studies.

    Introduction

    If you want to know how to become a virtual assistant as a student, you are in the right place. This career path lets you earn money, build professional skills, and work remotely around your class schedule. Many students worry they lack experience, but companies actually value the tech-savvy nature and fresh perspective that students bring .

    The virtual assistant market is growing rapidly and may reach $25.63 billion by 2025, with job postings increasing by over 35 percent . This guide walks you through seven clear steps to launch your virtual assistant journey today. Whether you study business, engineering, or liberal arts, you can start this flexible career. Let us explore exactly how to become a virtual assistant as a student without waiting for graduation.

    Step 1: Understand What a Virtual Assistant Does

    Before diving in, you must understand the daily tasks. A virtual assistant provides remote support to businesses or entrepreneurs using digital tools . When learning how to become a virtual assistant as a student, you should know that responsibilities vary widely by client.

    Common Virtual Assistant Responsibilities

    Most virtual assistants handle administrative tasks that save clients time . These include managing emails, scheduling appointments, and organizing calendars. You might also answer customer inquiries, update social media accounts, or enter data into spreadsheets . Some assistants help with research, preparing reports, or making travel arrangements. The role is flexible, which makes it perfect for students who need to work between classes.

    Why This Fits Student Life

    This career suits students because you work when you have free time. You are not tied to a physical office or fixed shifts. As you learn how to become a virtual assistant as a student, you will appreciate the ability to study in the morning and work in the afternoon. Many students start part-time while completing degrees in marketing, business administration, or communication . The experience you gain also looks great on your resume after graduation.

    Step 2: Identify Your Existing Skills

    You already have skills that clients need. The journey of how to become a virtual assistant as a student starts with recognizing what you can offer right now.

    Hard Skills You Probably Have

    Most students know how to use Google Docs, Microsoft Word, and email platforms . These basics are essential for administrative work. If you use social media daily, you already understand platforms like Instagram, TikTok, or LinkedIn. Many clients need help posting content or engaging with followers. You might also know Canva for simple graphic design or have typing skills from writing papers. These are all marketable abilities.

    Soft Skills Matter Too

    Communication is the most important soft skill for virtual assistants . You must write clearly and respond professionally. Organization helps you track deadlines for multiple clients. Time management ensures you complete tasks before they are due. Being reliable and quick to learn also impresses clients . When researching how to become a virtual assistant as a student, remember that personality often matters more than technical perfection.

    Step 3: Decide Which Services to Offer

    You cannot do everything well. Part of how to become a virtual assistant as a student involves choosing a niche or specific services to focus on.

    Popular Service Areas

    Many clients prefer specialists over generalists . Consider these popular options:

    • Social media management: Schedule posts, reply to comments, and track engagement.
    • Email management: Organize inboxes, draft replies, and filter spam.
    • Data entry: Transfer information between spreadsheets or databases.
    • Customer service: Answer questions via chat or email for online stores.
    • Content creation: Write simple blog posts or design social graphics.
    • Bookkeeping basics: Track expenses and income for small businesses .

    Start with one or two services you enjoy. You can always add more later as you gain confidence in how to become a virtual assistant as a student.

    Step 4: Build a Simple Portfolio

    You need proof of your abilities even without paid experience. When figuring out how to become a virtual assistant as a student, creating sample work helps you land that first client.

    Create Spec Samples

    Design sample social media posts for a fake brand. Write a mock email newsletter. Create a sample spreadsheet showing organized data. These demonstrate your skills to potential clients. You can also volunteer for a student organization on campus. Offer to manage their Instagram for a semester. This gives you real experience and a reference.

    Use Free Tools

    You do not need expensive software. Canva helps you design beautiful samples. Google Workspace shows you can handle documents and calendars. Trello or Notion demonstrates project management ability . Include screenshots of your work in a simple PDF portfolio. Write a short description of each sample explaining what you did. This proves you understand how to become a virtual assistant as a student practically.

    Step 5: Set Up Your Online Presence

    Clients need to find you and trust you. Part of how to become a virtual assistant as a student involves creating professional profiles online.

    Create a LinkedIn Profile

    LinkedIn is free and connects you with business professionals. Use a clear photo and write a headline like “Aspiring Virtual Assistant and Business Student.” List your skills and request recommendations from professors or club advisors. Join virtual assistant groups to learn from others .

    Consider Freelance Platforms

    Websites like Upwork and Fiverr connect beginners with clients . Create a profile highlighting your student status and availability. Set competitive but fair prices to attract your first projects. Some platforms even list entry-level virtual assistant jobs specifically for students . Completing your profile fully shows you are serious about how to become a virtual assistant as a student.

    Establish Your Brand

    Think about what makes you unique. Are you a fashion student who understands retail? A computer science student who can troubleshoot tech issues? Use this angle in your profiles. A strategic personal brand helps you stand out in search results .

    Step 6: Find Your First Clients

    Now comes the exciting part. Applying what you learned about how to become a virtual assistant as a student means actively seeking work.

    Where to Look

    Start with freelance job boards. Check listings for remote administrative assistants or social media helpers . Look for positions explicitly open to students or entry-level applicants . Some companies post virtual assistant jobs seeking motivated college students who are organized and detail-oriented .

    Network Smartly

    Tell friends and family about your services. Someone they know might need help. Join Facebook groups for entrepreneurs or small business owners. Offer value by answering questions before promoting yourself. Attend virtual networking events or campus career fairs. You never know who needs a virtual assistant.

    Apply Strategically

    When applying, read the job description carefully. Mention specific requirements in your proposal. Show you understand their business. Keep your message friendly and professional. Persistence matters in how to become a virtual assistant as a student. You might send several applications before landing your first client.

    Step 7: Deliver Excellent Work and Grow

    Getting the first client is just the beginning. Long-term success in how to become a virtual assistant as a student depends on quality and growth.

    Exceed Expectations

    Always meet deadlines. Communicate clearly if issues arise. Ask for feedback and implement it. Clients who love your work will hire you again and refer others. This is how you build a sustainable freelance business.

    Keep Learning

    The digital world changes fast. Take free online courses to upgrade skills. Learn about new tools like Slack, Asana, or Zoom . Consider certifications like Google Ads or Microsoft Office Specialist to boost credibility . Formal programs like the Certified Virtual Assistant course through institutions like Snow College can also provide credentials . Continuous learning ensures you stay valuable.

    Raise Your Rates

    As you gain experience and positive reviews, increase your prices. Students who master how to become a virtual assistant as a student often earn more each semester. Specializing in a niche also allows higher rates . What starts as pocket money can become serious income.

    Additional Resources for Student Virtual Assistants

    You do not have to figure this out alone. Many resources support your journey in how to become a virtual assistant as a student.

    Free Educational Content

    The European platform EPALE offers open educational resources on virtual assisting, covering everything from setting up a digital workspace to personal branding . These self-paced modules help you learn practical skills.

    University Career Services

    Your college likely has a career center. Schools like RMIT provide tools to help students craft resumes and cover letters tailored to virtual assistant roles . They can also help you identify transferable skills from coursework.

    Online Communities

    Forums and discussion boards host conversations about virtual assistant work. Experienced professionals share tips on getting started without experience . Learning from their journeys helps you avoid common mistakes.

    Common Mistakes to Avoid

    Knowing what not to do speeds up your success in how to become a virtual assistant as a student.

    • Undervaluing your work: Charging too little attracts difficult clients and leads to burnout.
    • Skipping contracts: Always have a written agreement outlining tasks and payment terms.
    • Overcommitting: Balance work with studies. Do not take more clients than you can handle.
    • Ignoring communication: Reply promptly and keep clients updated on progress.
    • Neglecting self-care: Schedule breaks and protect your study time.

    Conclusion

    Learning how to become a virtual assistant as a student opens doors to income, experience, and flexibility. The steps are clear: understand the role, identify your skills, choose services, build a portfolio, establish your presence, find clients, and deliver quality work. The demand for virtual assistants continues growing as more businesses embrace remote teams . You can start today with just a laptop and reliable internet. This career fits around your classes and builds professional skills employers love. For more detailed guides, tools, and resources to build your freelance career, visit evdrivetoday.com.

    Now it is your turn! What service are you most excited to offer as a student virtual assistant? Are you leaning toward social media management, email support, or something else? Share your thoughts and questions in the comments below. Let us support each other on this journey to financial freedom and professional growth

  • 7 Steps to Monetizing a Hobby: Turning Crafts into Cash

    7 Steps to Monetizing a Hobby: Turning Crafts into Cash

    Learn the secrets to monetizing a hobby effectively. This active guide covers pricing, platforms, and branding to help you turn crafts into cash today.

    Introduction

    If you have ever dreamed of monetizing a hobby like crafting, you are not alone. Many people spend their weekends knitting, woodworking, or making jewelry, never realizing that their passion could pay the bills. The truth is, turning your creative outlet into a source of income is more achievable today than ever before. With online marketplaces and social media, you can reach buyers worldwide from your living room.

    This guide walks you through seven practical steps to start monetizing a hobby without losing the joy that made you love it in the first place. We will cover everything from validating your idea to marketing your finished products. By the end, you will have a clear roadmap to turn your craft into cash.

    Step 1: Validate Your Craft Idea Before Investing Time

    Before you buy supplies in bulk or set up a shop, you need proof that people want what you make. Monetizing a hobby successfully means selling items that have real demand outside your friend group.

    Test the Waters with a Small Batch

    Start by creating a limited number of items and offering them to a small audience. You can do this by posting photos on your personal social media or showing them at a local craft fair. The goal is to see if strangers are willing to pay. If they are, that is a strong signal. If they come back for more or refer others, the signal is even stronger . Many people rush into monetizing a hobby only to find weak demand, so this step saves time and money.

    Ask for Honest Feedback

    Do not just ask friends and family if they like your work. They will almost always say yes. Instead, ask them what they would realistically pay. Join online communities related to your craft and share your work for constructive criticism. Listen carefully to what potential customers say they want or feel is missing in the market . This feedback is gold when you are serious about monetizing a hobby.

    Step 2: Understand Your True Costs

    When you start monetizing a hobby, the price you set can make or break your business. Many beginners underprice their work because they forget to account for everything.

    Calculate Materials and Labor

    Write down every single material that goes into one item. If you buy supplies in bulk, calculate the cost per use. For example, if a spool of wire costs £15 and makes 15 necklaces, the wire cost per necklace is £1 . Next, track how long it takes to make one item. Decide on an hourly wage you would like to earn. If you want £15 per hour and can make three items in that hour, your labor cost per item is £5 . Adding materials and labor gives you a baseline cost.

    Include Overhead and Fees

    Do not forget hidden expenses. Packaging, shipping supplies, platform fees (like Etsy’s $0.20 listing fee and 6.5% transaction fee), and even a portion of your electricity bill all count . When you are monetizing a hobby, these costs eat into your profit if ignored. Add them all up and divide by the number of items you expect to sell in a year. This gives you a true cost per item.

    Step 3: Price for Profit, Not Just Fun

    Pricing is where many crafters stumble. You love making things, so charging feels uncomfortable. But for monetizing a hobby to work, you must value your time.

    Use the Wholesale and Retail Formula

    A standard approach in the crafting world is to take your total cost (materials + labor + overhead) and multiply by two to get your wholesale price. Then multiply the wholesale price by two again to get your retail price . For example, if your total cost is £10, your wholesale price is £20, and your retail price is £40. This markup allows you to offer discounts, run sales, or sell to shops while still making a profit .

    Research the Market

    Look at what other sellers charge for similar items. If your prices are much higher, you need to communicate why (better materials, unique design). If they are much lower, you might be undervaluing your work. Price can signal quality. Too low, and customers might question your craftsmanship . Confident pricing is a key part of successfully monetizing a hobby.

    Step 4: Choose the Right Platform to Sell

    Where you sell matters. Each platform has different fees and audiences. When monetizing a hobby, you want to match your product to the right marketplace.

    Etsy for Handmade and Vintage

    Etsy is the go-to for handmade goods. It has millions of active buyers specifically looking for unique, crafted items . The setup is simple, and the community trusts the platform. However, you pay $0.20 per listing and a 6.5% transaction fee on sales . It is a great place to start monetizing a hobby because the audience is already there.

    Amazon Handmade for Scale

    Amazon Handmade offers access to Amazon’s massive customer base. There are no listing fees, but the referral fee is 15% per sale . Approval is stricter, and you face more competition. This option works well if you can produce higher volumes.

    Your Own Website for Full Control

    Shopify or Squarespace let you build your own brand without platform fees eating into every sale. You control the customer experience. However, you must drive your own traffic because there is no built-in audience . Many crafters start on Etsy while building an email list for a future independent site.

    Social Media and Local Markets

    Instagram and TikTok are powerful for showing your creative process . You can sell directly through Instagram Shops. Local craft fairs and markets also let customers see and touch your work, which builds trust fast . Combining online and offline sales is a smart strategy for monetizing a hobby.

    Step 5: Build a Brand That Stands Out

    When you are monetizing a hobby, you are not just selling an object. You are selling your unique style and story.

    Create a Memorable Name and Look

    Choose a business name that is broad enough to allow for growth . Use free tools like Canva to design a simple logo. Pick a color palette of four or five colors and use it consistently on your packaging, social media, and shop . This consistency makes you look professional.

    Tell Your Story

    Customers love to know the person behind the product. Share why you started crafting, what inspires you, and how you make your items. Use photos and videos to show your workspace. This personal connection turns one-time buyers into loyal fans . Storytelling is a powerful tool for monetizing a hobby because it adds value that mass-produced items cannot match.

    Step 6: Master Product Photography and Descriptions

    Online, customers cannot touch your work. Your photos and words must do the selling.

    Take High-Quality Photos

    Use natural light near a window. Shoot against a clean, simple background. Include close-ups showing texture and details. Also include lifestyle shots that show the item in use, like a mug on a cozy desk or earrings being worn . Good photos signal quality and care.

    Write Descriptions That Sell

    Do not just list dimensions. Describe the feel, the inspiration, and the use. For example: “This lavender-vanilla soy candle burns cleanly for 40+ hours, making it perfect for unwinding after work. Hand-poured in small batches using recyclable glass.” . Use keywords that customers might search for, like “handmade ceramic mug” or “personalized birthday gift.” When you are monetizing a hobby, your words bridge the gap between the screen and the customer’s imagination.

    Step 7: Market Authentically and Consistently

    You have made something beautiful. Now people need to see it. Marketing does not have to be complicated or expensive when you are monetizing a hobby.

    Leverage Social Media Wisely

    Pick one or two platforms you enjoy using. Post regularly, but focus on value, not just sales. Show behind-the-scenes videos, time-lapses of your making process, or the inspiration behind a new design . Use relevant hashtags like #HandmadeJewelry or #SmallBusinessCheck. Engage with comments and messages promptly. This builds community.

    Collaborate and Network

    Partner with local shops to display your work. Connect with other makers online. Join Facebook groups for craft sellers to share tips and support. Consider offering a small discount to customers who leave reviews. Positive social proof is incredibly powerful .

    Build an Email List

    Encourage people to sign up for your newsletter at markets or on your website. Email lets you talk directly to interested customers without algorithms getting in the way. Share new products, behind-the-scenes stories, and exclusive offers .

    Protecting Your Joy While Building Your Business

    One of the biggest risks of monetizing a hobby is losing the love for it. When you have deadlines and demanding customers, the fun can fade.

    Set Boundaries Early

    Decide how many custom orders you will accept. Work in batches rather than on demand to avoid burnout. Set aside time each week to create just for yourself, with no commercial goal . Protecting this space keeps your creativity alive.

    Grow at Your Own Pace

    You do not need to scale up overnight. Unlike a startup chasing rapid growth, your craft business can expand slowly and naturally . Test new products, listen to feedback, and only add systems when you need them. Sustainable growth is healthier for both you and your business.

    Know When to Pause

    If the joy starts disappearing, it is okay to step back. You can reduce orders, take a seasonal break, or even stop selling for a while. The goal of monetizing a hobby is to enhance your life, not drain it .

    Common Mistakes to Avoid

    • Underpricing: This leads to burnout and makes you resent your craft.
    • Ignoring Fees: Platform and payment processing fees add up. Factor them in.
    • Inconsistent Branding: Using different names or logos confuses customers.
    • Poor Customer Service: Slow replies or bad shipping experiences lead to negative reviews.
    • Scaling Too Fast: Taking on more orders than you can handle drops quality.

    Conclusion

    Learning how to approach monetizing a hobby is a journey that combines creativity with smart business sense. By validating your idea, pricing correctly, choosing the right platforms, and marketing authentically, you can build a fulfilling income stream from something you already love. The demand for unique, handmade items continues to grow as people seek alternatives to mass-produced goods. Your craft has value. Now you have the tools to share it with the world. For more detailed guides, resources, and tools to grow your creative business, visit evdrivetoday.com.

    Now it is your turn! What craft are you most excited to turn into cash? Are you a knitter, a candle maker, a painter, or something else? Share your craft and any questions you have in the comments below. Let us cheer each other on as we turn passion into profit

  • 5 Principles for The Ethics of Side Hustles: Being Fair and Getting Paid

    5 Principles for The Ethics of Side Hustles: Being Fair and Getting Paid

    Navigate the ethics of side hustles with this active guide. Learn how to balance fairness, transparency, and getting paid while protecting your reputation.

    Introduction

    When you start a second job, you must consider the ethics of side hustles from day one. Many people jump into freelance work without thinking about conflicts of interest or fairness to their primary employer. This oversight can damage your reputation and even cost you your main income. The ethics of side hustles covers everything from using company time to pricing your services fairly. This guide breaks down five essential principles to help you build a side business you can be proud of. We will explore real situations and practical solutions. By the end, you will understand how to grow your income while maintaining integrity. Let us dive into why the ethics of side hustles matters for your long-term success.

    Principle 1: Understand Your Employment Contract

    Before you start any side work, read your current employment contract carefully. The ethics of side hustles begins with knowing what rules you agreed to when you took your main job.

    Check for Exclusivity Clauses

    Many employment contracts contain clauses about outside work. Some companies require you to devote your full professional effort to them. Others specifically ban working for competitors. If your contract prohibits other income-generating activity, you must address this before proceeding . Ignoring these terms is not just unethical; it can get you fired. When examining the ethics of side hustles, always put your primary obligations first.

    Ask Permission When Unsure

    If your contract is unclear, ask your HR department or manager. Ankita Ray, partner at Cyril Amarchand Mangaldas, advises that the best approach is to speak with your employer to ensure you are not breaking any rules . Some companies will grant exceptions on a case-by-case basis. Being upfront shows respect and builds trust. Transparency is a cornerstone of the ethics of side hustles.

    Principle 2: Never Use Company Time or Resources

    One of the clearest ethical rules involves separating your side work from your day job. The ethics of side hustles demands that your primary employer gets what they pay for.

    Keep Side Work Outside Working Hours

    Do not run your side business during your 9-to-5. It is tempting to send a quick email to a freelance client while at your desk, but do not do it. Michael Anderson, writing for the American Statistical Association, warns that with all the tracking software on the market, companies know what happens on their computers . They also have a legal right to observe any email you send . If you must handle side business tasks, do them during lunch breaks from your personal phone or laptop, never on company time or equipment.

    Avoid Company Equipment

    Your work laptop, printer, and software licenses belong to your employer. Using them for your side hustle is essentially stealing. It also creates legal complications if your side business ever faces a lawsuit. Protecting the ethics of side hustles means keeping your work life completely separate from your employee life.

    Principle 3: Disclose Conflicts of Interest

    Conflicts of interest damage trust faster than almost anything else. The ethics of side hustles requires you to examine whether your side work competes with or influences your main job.

    Avoid Competing with Your Employer

    Do not run a side business that competes with your day job. This is not only unethical but can result in a lawsuit . If you work for a marketing agency, do not take on freelance clients who are also seeking marketing help. If you develop software for a tech company, do not build competing apps at night. Your employer trusted you with their strategies and secrets. Using that knowledge for personal gain violates the ethics of side hustles at the deepest level.

    Consider Appearances

    Sometimes even the appearance of a conflict is damaging. David Rafferty, a Greenwich resident, posed a relevant question about elected officials taking outside work: “Yes you can, but should you?” . This applies to all workers. If your side hustle involves companies that do business with your employer, or if your role gives you insider knowledge, the optics matter. Rafferty argues that without transparency, “there’s always going to be the lingering whiff of impropriety” . When evaluating the ethics of side hustles, ask yourself how your actions would look if your boss found out tomorrow.

    Principle 4: Deliver Fair Value to Side Clients

    The ethics of side hustles applies not only to your employer but also to the clients who pay you for side work. Fairness goes both ways.

    Set Realistic Expectations

    Be honest with side clients about your availability. Tell them this is a side business you conduct after regular hours. Explain that they should expect emails when you have likely gone home . If you cannot meet a deadline because your day job got busy, communicate early. Clients appreciate honesty far more than broken promises. Fair treatment builds repeat business and referrals.

    Price Transparently and Fairly

    Fair pricing means charging rates that reflect your skills without taking advantage of clients. In the gig economy, some platforms have faced criticism for opaque payment structures. For example, the Platform Workers Trilateral Group in Singapore recently published recommendations calling for fairer and safer payment schemes to improve transparency and avoid workers working long hours for uncertain earnings . As an individual side hustler, you can lead by example. Clearly state your rates, explain what they include, and stick to your agreements.

    Use Written Contracts

    A solid agreement between you and the client is a must. The days of the handshake deal are gone . Your contract does not need to be twenty pages long, but it should outline scope, payment terms, and revision policies. Having a lawyer review your standard contract protects both you and your clients. This professionalism demonstrates that you take the ethics of side hustles seriously.

    Principle 5: Be Transparent About Your Income

    Transparency is a growing trend among side hustlers, and it connects directly to the ethics of side hustles.

    Why People Share Side Income

    Many side hustlers now openly share their earnings online. On TikTok, the hashtag “side hustle income” has accumulated millions of views . Tolu Frimpong, a marketing manager and content creator, openly shares her side income journey because she believes it could help others meet their financial goals . Similarly, Sira Masetti shares insights about her side hustle earnings to inspire people to build long-term wealth . This transparency builds community and sets honest expectations about what is possible.

    The Difference from Salary Transparency

    Interestingly, many of these same people keep their full-time salaries private. Masetti worries that others will assume she is worth what she earns at her corporate job and judge her unfairly . Matt Brighton, who earns significant side income, feels fine sharing those numbers because his side business has nothing to do with the workplace . This distinction highlights an important point: the ethics of side hustles encourages openness about your independent work while respecting that full-time salary discussions remain more complex.

    Why Transparency Matters

    Gabriela Serpa Royo, an analyst at Canvas8, explains that the creator economy is fertile ground for new work rules because there is no HR department or clear career path . People turn to each other for information about steps and earnings. By being transparent, you contribute to a culture where the ethics of side hustles evolves toward greater fairness for everyone.

    Special Considerations for Gig Workers

    If your side hustle involves platform work like driving, delivery, or task services, additional ethical considerations apply.

    Know the Platform Rules

    Some platforms have strict rules about account sharing or illegal activities. The Platform Workers Trilateral Group recommends strengthening enforcement against unauthorized activities, such as foreigners using local workers’ accounts . Violating platform terms not only risks deactivation but also undercuts honest workers. Following the rules is part of the ethics of side hustles.

    Advocate for Better Standards

    You can also support efforts to make gig work fairer for everyone. In Germany, eight platforms signed a “Crowdsourcing Code” containing agreed terms including fair compensation . In Victoria, Australia, the government introduced Voluntary Fair Conduct and Accountability Standards focusing on fair pay, dispute resolution, and worker safety . Supporting these initiatives strengthens the ethics of side hustles across entire industries.

    Common Ethical Dilemmas and Solutions

    Let us apply these principles to real situations you might face.

    Dilemma: Your Side Hustle Takes Off and You Feel Tired at Your Day Job

    Solution: Scale back your side work or discuss reducing your main job hours. Showing up late, distracted, or overtired violates your commitment to your employer . Your primary job deserves your best effort during working hours.

    Dilemma: A Side Client Asks You to Misrepresent Yourself

    Solution: Decline the work. Your reputation is your most valuable asset. One unethical project can destroy years of good work.

    Dilemma: You Discover Your Side Hustle Competes with a Department in Your Company

    Solution: Stop immediately and evaluate. You may need to quit the side work or, if possible, transfer departments. Conflicts of interest rarely resolve themselves.

    Dilemma: You Are Unsure If a Project Crosses an Ethical Line

    Solution: Ask yourself the golden rule. Treat your employer the way you want your future employees to treat you . If you cannot explain the situation to your boss with your head held high, do not do it.

    Building a Sustainable Ethical Practice

    The ethics of side hustles is not a one-time check box. It requires ongoing attention.

    Create a Business Plan

    Treat your side hustle like a real business. A business plan helps guide you and can answer difficult questions about the venture . It forces you to think through potential conflicts before they arise.

    Get Organized

    As your business grows, organization becomes critical. Use a structured system for invoices, contracts, and client communications . This professionalism supports ethical behavior by making everything transparent and trackable.

    Protect Yourself with Insurance

    Consider errors and omissions liability insurance for consulting work. One claim can make the cost well worth it, not to mention the peace of mind it brings . Insurance shows clients you take your responsibilities seriously.

    Take Care of Yourself

    The side hustle can be rewarding and exhausting at the same time . Make time for physical exercise and real rest. Burnout leads to poor decisions and ethical shortcuts. Protecting your wellbeing protects your integrity.

    Conclusion

    Navigating the ethics of side hustles requires thoughtfulness and integrity. By understanding your employment contract, keeping side work separate, disclosing conflicts, delivering fair value, and embracing transparency, you build a reputation that supports long-term success. The growing side economy offers incredible opportunities, but those opportunities come with responsibility. Your employer, your clients, and you all deserve fairness. When you build your side hustle on an ethical foundation, you create something sustainable and rewarding. For more detailed guides, resources, and tools to grow your freelance career ethically, visit evdrivetoday.com.

    Now it is your turn! Have you faced an ethical dilemma with your side hustle? How did you handle it? Share your experiences and questions in the comments below. Let us learn from each other and build a community of fair, successful side hustlers.

  • Gross Pay vs. Net Pay: Why Your First Paycheck Was Smaller Than You Thought

    Gross Pay vs. Net Pay: Why Your First Paycheck Was Smaller Than You Thought

    Confused by gross pay vs. net pay? This active guide explains why your paycheck is smaller, breaks down every deduction, and helps you budget smarter.

    Introduction

    If you just received your first paycheck and wondered where half the money went, you are experiencing the reality of gross pay vs. net pay. You accepted a job offering £30,000 per year, but your bank deposit looks nothing like that number. Do not panic—this happens to every new employee. Gross pay vs. net pay explains the entire gap between what you earn and what you actually take home.

    Gross pay is your total earnings before any deductions, while net pay is the amount deposited into your account after taxes, insurance, and other withholdings. This guide breaks down every penny taken from your check. By understanding gross pay vs. net pay, you will never be surprised again. Let us dive into why your first paycheck felt so light.

    What Exactly Is Gross Pay?: Gross Pay vs. Net Pay

    Gross pay represents the total amount you earn during a specific pay period before anything is removed . This is the number you negotiated during your job interview and the figure written in your employment contract.

    Components of Gross Pay

    For salaried employees, calculating gross pay is simple. Take your annual salary and divide it by the number of pay periods in a year. If you earn £30,000 and get paid monthly, your monthly gross pay is £2,500 .

    Hourly workers calculate gross pay by multiplying their hourly rate by hours worked. If you earn £15 per hour and work 40 hours, your weekly gross pay is £600. This calculation also includes overtime pay at a higher rate, usually 1.5 times your normal hourly wage .

    What Gross Pay Includes

    Your gross pay is not just your base salary or hourly wages. It also includes:

    • Overtime earnings
    • Commissions from sales
    • Performance bonuses
    • Shift differentials
    • Holiday and vacation pay

    Understanding your gross pay matters because it determines your tax bracket and pension contributions . However, do not plan your budget around this number. That is where gross pay vs. net pay becomes crucial.

    What Exactly Is Net Pay?: Gross Pay vs. Net Pay

    Net pay is the actual amount of money deposited into your bank account on payday . It is often called “take-home pay” because it is yours to spend. Net pay equals your gross pay minus all mandatory and voluntary deductions .

    The Simple Net Pay Formula

    Net pay = Gross pay – Total deductions

    If your monthly gross pay is £2,500 and your deductions total £500, your net pay is £2,000. This £2,000 is what you actually have for rent, food, and savings.

    Why Net Pay Is What Matters

    Financial experts agree: base all your personal budgeting and spending decisions on your net pay . When you apply for a mortgage, lenders look at your gross pay, but for daily life, net pay tells the real story. Two people with identical gross pay can have completely different net pay amounts based on their tax situations and benefit choices .

    Understanding gross pay vs. net pay helps you appreciate why your first paycheck felt smaller. The deductions listed below explain the gap.

    Mandatory Deductions That Shrink Your Paycheck

    Every employee faces mandatory deductions. These are required by law and appear on every payslip. When comparing gross pay vs. net pay, mandatory deductions explain most of the difference.

    Income Tax

    Income tax is usually the largest deduction from your gross pay. The amount depends on how much you earn and your tax code. Most people have a personal allowance—an amount you can earn before paying any tax .

    In the UK, tax rates are tiered. You pay a basic rate on income above your personal allowance, then a higher rate on earnings above certain thresholds. Your employer calculates this based on your tax code and removes it automatically from your gross pay before you ever see the money .

    Understanding gross pay vs. net pay helps you appreciate why your first paycheck felt smaller. The deductions listed below explain the gap.

    National Insurance Contributions

    National Insurance is another mandatory deduction from your gross pay. These contributions build your entitlement to state benefits, including the State Pension and Maternity Allowance .

    The amount you pay depends on your earnings. Like income tax, it is calculated as a percentage of your gross pay above a certain threshold. Your employer deducts this automatically and sends it to HMRC .

    Social Security and Medicare (For US Readers)

    If you work in the United States, you will see FICA taxes on your payslip. This includes Social Security tax at 6.2% of your gross pay up to a wage base limit, and Medicare tax at 1.45% on all earnings . High earners pay an additional 0.9% Medicare tax .

    These are mandatory deductions that directly reduce your gross pay to arrive at your net pay.

    The Order of Deductions

    When your gross pay is not enough to cover all deductions, specific rules determine the order. Retirement deductions, Social Security, Medicare, and federal income taxes come first . Then come health insurance premiums, followed by court-ordered collections like child support, and finally voluntary deductions . This hierarchy ensures critical obligations are met before optional ones.

    Voluntary Deductions You Choose

    Beyond mandatory taxes, voluntary deductions also reduce your gross pay before you receive your net pay. These are benefits you elect to receive, and they are usually worth the cost.

    Pension Contributions

    If your employer offers a workplace pension, you are likely automatically enrolled. A percentage of your gross pay goes into your pension fund, and your employer usually contributes as well .

    This deduction reduces your net pay now but builds retirement savings for later. When looking at gross pay vs. net pay, pension contributions are a form of forced savings that many employees appreciate.

    Health Insurance Premiums

    Health, dental, and vision insurance premiums are common voluntary deductions . Your share of the premium comes directly out of your gross pay. This is often more tax-efficient than paying for insurance yourself after receiving your net pay.

    Other Voluntary Deductions

    You might also see deductions for:

    • Union dues
    • Charitable contributions through payroll giving
    • Life insurance premiums
    • Health Savings Account (HSA) or Flexible Spending Account (FSA) contributions
    • Repayment of loans from your retirement account

    All of these reduce your gross pay to determine your final net pay. Understanding gross pay vs. net pay means recognizing that some deductions are investments in your future, not just money disappearing.

    A Real-World Example of Gross Pay vs. Net Pay

    Let us walk through a concrete example to see gross pay vs. net pay in action. This makes the concept real.

    The Employee Profile

    Meet Sarah. She just started a job with a gross pay of £30,000 per year. She is paid monthly, so her monthly gross pay is £2,500. She is single, has no student loans, and contributes 5% of her salary to her workplace pension.

    The Deduction Calculation

    Using UK tax rates for the 2024/2025 tax year, here is what happens to Sarah’s gross pay:

    • Starting monthly gross pay: £2,500
    • Income tax deduction: -£290 (approximately, based on her tax code)
    • National Insurance deduction: -£116 (approximately)
    • Pension contribution (5%): -£125

    The Final Net Pay

    Total deductions: £531

    Net pay = £2,500 – £531 = £1,969

    Sarah’s gross pay of £30,000 annually becomes net pay of approximately £23,628 per year—a difference of over £6,000 .

    This example of gross pay vs. net pay shows why your first paycheck feels smaller. The money went to taxes, National Insurance, and your future pension. All important, but none available for spending today.

    Why Two People with the Same Gross Pay Take Home Different Net Pay

    One fascinating aspect of gross pay vs. net pay is that identical salaries can yield different net pay amounts.

    Tax Status Differences

    Consider two workers in the same US state, each earning $60,000 gross pay. The first is single. The second is married with two children .

    The married worker with children pays less in taxes due to different tax brackets and additional exemptions. Even though he pays more for family health insurance, his net pay might be $2,770 higher than his single colleague .

    Benefit Choices Matter

    If you enroll in extensive benefits—heavy life insurance, maximum health coverage, high pension contributions—your net pay will be lower than someone who opts for minimal benefits. Understanding gross pay vs. net pay helps you make informed choices about which deductions provide value for your situation.

    How to Read Your Payslip

    Your payslip contains all the information you need to understand gross pay vs. net pay for your specific situation.

    What Your Payslip Shows

    A proper payslip lists:

    • Your gross pay for the period
    • Each individual deduction itemized
    • The total deductions
    • Your final net pay

    Employers must provide this breakdown so you can verify accuracy. If you ever have questions, your HR or payroll department can explain specific line items .

    Check for Errors

    Mistakes happen. Incorrect tax codes, wrong benefit deductions, or miscalculated overtime all affect your net pay. Review every payslip when you start a new job and periodically thereafter. Understanding gross pay vs. net pay empowers you to catch errors early.

    Why Gross Pay Still Matters

    Despite focusing on net pay for budgeting, gross pay remains important for several reasons.

    Loan and Mortgage Applications

    When you apply for a mortgage or large loan, lenders ask for your gross pay . They use this number to determine how much you can borrow. Even though you cannot spend your gross pay, lenders view it as your true earning capacity.

    Salary Negotiations

    Always negotiate your gross pay, not your net pay. Net pay fluctuates based on tax laws and benefit choices outside your control. Your gross pay is the fixed number that forms the foundation of your compensation package .

    Pension Calculations

    Your pension contributions are typically a percentage of your gross pay. Higher gross pay means more money going into your retirement fund, even if your immediate net pay is lower due to those contributions.

    Tips to Maximize Your Net Pay

    You cannot avoid taxes, but you can make smart choices that improve your net pay over time.

    Review Your Tax Code

    Ensure your tax code is correct. An incorrect code means overpaying or underpaying tax. If you overpay, you will get it back eventually, but your immediate net pay suffers. Use HMRC’s online tools or consult your payroll department .

    Choose Benefits Wisely

    Some benefits reduce your taxable gross pay, which can lower your tax bill while providing valuable coverage. Pension contributions, cycle-to-work schemes, and charitable giving through payroll can be tax-efficient .

    Understand Your Student Loan Repayments

    If you have student loans, repayments come directly from your gross pay. Understand your repayment plan and how much you will owe each month . This prevents surprises when you see your net pay.

    Check for Wage Garnishments

    In rare cases, court-ordered wage garnishments for child support or debt repayment reduce your net pay . If you have these, ensure the amounts are correct.

    Common Questions About Gross Pay vs. Net Pay

    Is gross pay always higher than net pay?

    Yes. Your gross pay is always higher than or equal to your net pay . Gross pay is your full earnings. Net pay is what remains after deductions.

    Why is my advertised salary different from my take-home pay?

    The advertised salary is your gross pay. Your take-home pay is lower because income tax, National Insurance, and other deductions are subtracted before you receive it .

    Do all employees pay the same deductions?

    No. Deductions vary based on earnings, tax codes, student loans, and pension choices . This is why understanding gross pay vs. net pay for your specific situation matters.

    Should I negotiate gross or net salary?

    Always negotiate gross salary. This is the standard figure in contracts and for pay rises. Your net pay can change, but your gross salary remains the basis of your compensation .

    Conclusion

    Understanding gross pay vs. net pay transforms a disappointing first paycheck into a learning opportunity. Gross pay is your total earnings before deductions—the number you negotiated and the figure on your contract. Net pay is what actually hits your bank account after taxes, National Insurance, pension contributions, and other deductions. The gap between them can be thousands of pounds annually, but now you know exactly where that money goes.

    Use this knowledge to budget based on your net pay, verify your payslips for accuracy, and make informed choices about voluntary deductions. Your first paycheck taught you a valuable lesson. Future paychecks will hold no surprises. For more detailed guides on personal finance, career development, and making the most of your money, visit evdrivetoday.com.

    Now it is your turn! What was your biggest surprise when you saw your first paycheck? Did you expect a certain deduction that was missing? Share your experience in the comments below. Your story might help another first-time employee understand their own gross pay vs. net pay situation better.

  • 10 Creative Side Hustles for Artistic Teens

    10 Creative Side Hustles for Artistic Teens


    Turn your talent into cash! Discover 10 creative side hustles for artistic teens that pay real money, from selling crafts to digital design work.

    If you have a passion for painting, drawing, or crafting, you have a valuable asset. This list of 10 creative side hustles for artistic teens will show you exactly how to monetize your talent. You do not need a fancy degree or years of experience. You just need creativity, drive, and a willingness to put your work out there. These ideas range from selling physical products to offering digital services. There is something here for every type of artist. Let us explore how you can turn your hobby into a profitable venture.

    Why Art is a Great Side Hustle

    Artistic skills are in high demand. People and businesses always need visual content. They need logos, illustrations, and unique handmade items. As a teen, you have a fresh perspective. Your style is unique and can stand out in a crowded market.

    Starting young also builds your portfolio early. Every piece you create for a client adds to your experience. This helps you land bigger and better jobs in the future. Whether you want to save for a car or just have spending money, these 10 creative side hustles for artistic teens offer flexible, fun ways to earn.

    1. Sell Handmade Crafts on Etsy: Creative Side Hustles for Artistic Teens

    Etsy is the go-to platform for handmade goods. If you make jewelry, pottery, candles, or knitted items, this is your market. You set up a shop, take photos of your products, and list them for sale. People all over the world search Etsy for unique items every day .

    The key to success is great photography. Clear, bright photos make your items look professional. Write honest descriptions about your materials and process. With a parent’s help to manage the financial side, Etsy is a perfect outlet for physical art. It is a top contender on our list of 10 creative side hustles for artistic teens.

    2. Offer Custom Portrait Commissions: Creative Side Hustles for Artistic Teens

    Do you specialize in portraits? Offer to draw people’s pets, families, or favorite celebrities. Many people love custom artwork as gifts. You can work from photos they send you.

    Promote your work on social media. Post examples of your portraits with a clear call to action: “DM me to order your own!” Start with friends and family to build a portfolio. Word of mouth spreads fast when you deliver quality work. This personal touch makes it one of the most rewarding 10 creative side hustles for artistic teens.

    3. Design Custom T-Shirts

    T-shirt design is a massive industry. You can use print-on-demand services like Printful or Redbubble. You upload your design, and the company prints and ships the shirt when someone orders it. You never hold inventory.

    You can also team up with local schools or sports teams. Offer to design their team shirts or hoodies. This requires building relationships but can lead to bulk orders. It is a scalable way to see your art on real people. This option combines fashion and art perfectly.

    4. Create Coloring Books: Creative Side Hustles for Artistic Teens

    Coloring books are not just for kids anymore. Adults love intricate, relaxing coloring pages too. You can create a book of your own designs. Use tools like Canva or Adobe InDesign to layout the pages.

    Sell your coloring book as a PDF download on Etsy or Gumroad. Digital products are great because you make them once and they sell forever. You can also sell physical copies through Amazon’s Kindle Direct Publishing (KDP). This is a fantastic way to package your art into a sellable product. It deserves a spot on any list of 10 creative side hustles for artistic teens.

    5. Sell Printables and Wall Art

    Minimalist wall art is very popular. You can create motivational quotes, abstract designs, or nature scenes. Sell them as digital downloads. The buyer prints them at home or at a local print shop.

    This hustle has low overhead. You just need design software and creativity. Market your printables on Pinterest and Instagram. Stylish, affordable art appeals to young adults decorating dorms and first apartments. It taps into a huge market.

    6. Start a Greeting Card Business: Creative Side Hustles for Artistic Teens

    Everyone needs birthday and holiday cards. Handmade cards feel special and personal. Create a line of cards featuring your original art. You can sell them individually or in packs.

    Approach local gift shops or boutiques about carrying your cards on consignment. You can also sell them on Etsy. People love supporting local artists. A simple, heartfelt card can brighten someone’s day and put money in your pocket. It is a classic idea among 10 creative side hustles for artistic teens.

    7. Offer Logo Design Services

    Small businesses always need logos. A good logo is the face of a company. If you have graphic design skills, you can offer this service on platforms like Fiverr or Upwork (with parental supervision).

    Start with simple, clean designs. Learn the basics of color theory and typography. The University of Illinois Extension offers resources on design principles that can help you improve your skills . Logo design pays well and builds a professional portfolio. It moves your art into the business world.

    8. Paint Custom Sneakers and Jackets

    Customizing clothing is a huge trend. Artists use fabric paint or markers to create one-of-a-kind sneakers and denim jackets. This appeals to people who want unique fashion.

    Offer your services on social media. Show before-and-after photos of your work. Charge for the materials plus your time. This is a high-ticket item. People pay good money for wearable art. It allows you to experiment and create bold, statement pieces.

    9. Sell Digital Stickers and Icons

    Digital stickers are used in planning apps, messaging, and social media. You can create cute characters, food items, or motivational icons. Sell them as PNG files or sticker packs.

    This is another digital product with high profit margins. Platforms like Creative Market and Etsy are great for this. If you use an iPad and Procreate, you can create stickers quickly. It is a fun, modern way to share your art with the world. It fits perfectly into the digital age.

    10. Offer Face Painting at Events

    If you are outgoing and good with people, try face painting. Local fairs, birthday parties, and school events always need face painters. You can charge by the face or by the hour.

    Check your local regulations about permits. Practice on friends and family first to build speed and confidence. The National Association for the Self-Employed offers resources on starting a service-based business . This is an interactive way to use your art and make people smile.

    Building Your Online Presence

    To succeed with any of these 10 creative side hustles for artistic teens, you need an audience. Create an Instagram or TikTok account dedicated to your art. Post your work regularly. Use relevant hashtags so people can find you.

    Engage with your followers. Reply to comments. Ask them what they want to see. Building a community around your art creates loyal customers. They will be the first to buy when you launch a new product. Social media is your free marketing department.

    Pricing Your Artwork

    Pricing art is hard. You worry about charging too much or too little. Start by calculating your costs. If you sell a physical item, how much did the materials cost? Then add your hourly wage.

    Research what other artists charge for similar items. Do not undervalue your work. Your time and creativity have worth. As you gain experience and followers, you can raise your prices. Be confident in your value. It is a crucial skill for any creative entrepreneur.

    Protecting Your Work

    When you share art online, there is a risk of theft. People might copy or steal your images. Watermark your photos when you post them. Use a logo across the image so it is hard to remove.

    For digital products, include copyright notices in your files. Registering your work with the U.S. Copyright Office provides legal protection, though it costs money . For most teens, clear watermarks and terms of use are enough. Stay vigilant and report anyone who steals your work.

    Managing Time and Schoolwork

    Balancing a side hustle with school is tricky. You do not want your grades to suffer. Set a schedule. Dedicate specific hours to your art business. Treat it like a job.

    Use a planner to track orders and deadlines. Do not overcommit. It is better to deliver five amazing pieces on time than ten rushed ones. School comes first. Your art business should enhance your life, not stress you out. Time management is key to enjoying your hustle.

    Learning and Improving

    Always work on your craft. Take online courses to learn new techniques. Platforms like Skillshare and YouTube offer endless tutorials. The more you learn, the better your products become.

    Join online communities of young artists. Share tips and support each other. Learning from peers is invaluable. Continuous improvement keeps your work fresh and exciting. It ensures your hustle stays relevant and profitable.

    Conclusion

    Your artistic talent is a gift. With effort and smart planning, it can also be a source of income. These 10 creative side hustles for artistic teens provide a roadmap. Choose the ones that excite you most. Start small, stay consistent, and watch your creativity pay off.

    For more resources on managing your small business and connecting with other young entrepreneurs, be sure to visit evdrivetoday.com. We have guides to help you succeed every step of the way.

    Now, we want to hear from you! Which of these creative hustles are you most excited to try? Do you have another idea to add to the list? Drop a comment below and share your thoughts with our community.

  • How to Sell Your Old Clothes on Depop or Poshmark

    How to Sell Your Old Clothes on Depop or Poshmark

    Ready to turn your wardrobe into cash? Learn how to sell your old clothes on Depop or Poshmark with this step-by-step guide for beginners.

    If your closet is bursting with clothes you no longer wear, you are sitting on a goldmine. This guide on how to sell your old clothes on Depop or Poshmark will show you exactly how to turn that clutter into cash. These apps make it simple to list items, connect with buyers, and ship your sales. You do not need any special experience. You just need a smartphone, some good lighting, and a willingness to learn. Let us walk through the entire process, from choosing the right platform to packing your first sale.

    Why Sell Your Clothes Online?

    How to Sell Your Old Clothes on Desktop or Poshmark:How to Sell Your Old Clothes

    Selling secondhand clothing has exploded in popularity. It is good for your wallet and good for the planet. Instead of letting old clothes sit in a landfill, you give them a second life. Plus, you earn money that you can save or spend on new things.

    The best part is that anyone can do it. You do not need a business license or a storefront. Apps like Depop and Poshmark handle the hard parts. They provide the audience and the payment system. You just provide the items and the effort. Understanding how to sell your old clothes on Depop or Poshmark opens up a flexible, fun side hustle.

    Depop vs. Poshmark: Which One is Right for You?

    Before you start taking photos, you need to choose your platform. Depop and Poshmark serve different audiences and work in different ways. Picking the right one for your items makes a huge difference in how fast they sell and how much money you make .

    Depop: The Trendy, Visual Marketplace: How to Sell Your Old Clothes

    Depop feels a lot like Instagram. You scroll through a feed of items, like photos, and follow shops you enjoy. The audience is mostly Gen Z and younger millennials. They love vintage, streetwear, Y2K fashion, and unique, curated pieces .

    If your closet is full of band tees, oversized denim, or indie brand finds, Depop is your best bet. Sellers often build a personal brand and style their photos to look aesthetic. The vibe is creative and community-driven . About 90% of Depop’s users are under the age of 35, making it the go-to for trendy fashion .

    Poshmark: The Community-Driven Boutique: How to Sell Your Old Clothes

    Poshmark attracts a slightly older crowd, from their mid-20s to mid-40s. Shoppers here look for mainstream brands like Lululemon, Madewell, Nike, and J.Crew . The platform is less about “vibes” and more about clear, clean listings.

    Poshmark runs on “shares.” You share your own listings and others’ to gain visibility. It has a strong community feel with “Posh Parties” where sellers share items from specific categories . If you have workwear, athleisure, or contemporary brands, Poshmark is a powerful platform.

    Quick Comparison: How to Sell Your Old Clothes

    To help you decide, here is a simple breakdown:

    • Fees: Depop takes 10% plus a small payment processing fee (around 2.9% + $0.30). Poshmark takes a flat 20% on sales over $15, but this includes the shipping label .
    • Shipping: On Depop, you set your own shipping prices and buy labels yourself. On Poshmark, they provide a prepaid, discounted label automatically .
    • Best For: Depop is best for vintage, unique, and trendy items. Poshmark is best for branded, everyday wear .

    Many successful sellers use both platforms. They list their trendy items on Depop and their brand-name basics on Poshmark. This strategy helps you reach the widest possible audience .

    Step 1: Audit Your Closet and Gather Supplies

    Walk through your closet and pull out anything you no longer wear. Be honest. If you haven’t worn it in a year, it is time to let it go. Look for items in good condition. Small flaws are okay if you mention them, but major stains or tears are hard to sell.

    Once you have your pile, gather your supplies. You will need:

    • A smartphone or camera
    • Good natural lighting (near a window is perfect)
    • A plain background (a white wall or clean floor works)
    • Measuring tape
    • Shipping supplies (poly mailers or boxes, tape, a printer)

    Step 2: Prepare Your Items for Sale

    First impressions matter online. Wash or dry clean everything. A fresh smell makes a huge difference. Steam or iron out any wrinkles. Remove any pet hair. Your items should look as close to new as possible.

    Check for any loose threads or missing buttons. Fix what you can. If there is a flaw you cannot fix, be honest about it in your listing. Transparency builds trust with buyers .

    Step 3: Take High-Quality Photos

    Photos are the most important part of your listing. Bad photos mean no sales. Use natural daylight. Set up near a window and avoid using your flash, which can create harsh shadows.

    Take multiple shots:

    • A front view of the item
    • A back view
    • Close-ups of unique details (embroidery, buttons, fabric texture)
    • Close-ups of the tag (to show brand and size)
    • A shot of any flaws (this is crucial for honesty)

    If you can, include a “lifestyle” shot. This means wearing the item or styling it on a mannequin. It helps buyers imagine how it looks on a real person. For Depop, lifestyle shots are especially powerful . For Poshmark, clean flat lays on a neutral background work perfectly .

    Step 4: Write Detailed Descriptions

    Your description needs to answer every question a buyer might have. Start with the brand, size, and color. Then describe the condition. Be specific. “Great condition” is vague. “Worn twice, no stains, no smells” is better.

    Always include measurements. Sizes vary wildly between brands. Measure the pit-to-pit (armpit to armpit), the length from shoulder to hem, and the waist for bottoms. This simple step reduces returns and builds trust .

    Finally, add some styling notes. Say something like, “This oversized blazer looks great with jeans and sneakers for a casual look.” This helps buyers see the value in your item.

    Step 5: Price Your Items Competitively

    Pricing can be tricky. You want to make money, but you also want to sell. Search for similar items on the platform you are using. Look at sold listings to see what people actually paid . This gives you a realistic target.

    Factor in the platform’s fees. If you want to earn $20 from a Depop sale, you might need to list it around $23 to cover the 10% fee and shipping costs. On Poshmark, you need to account for the 20% fee. Build these costs into your price so you are not surprised by your final payout.

    Remember, you can always accept offers. Many buyers expect to negotiate. Leave a little room in your price so you can say yes to a reasonable offer and still make a profit .

    Step 6: Create Your Listing

    On Depop, you write a casual, engaging caption. Use relevant hashtags like #Y2K, #Vintage, or #Streetwear to help people find you . On Poshmark, focus on keywords in the title. Include the brand and item type, like “Lululemon Align Leggings Size 6” .

    Upload your best photo as the cover image. This is what people see first in search results. Make it eye-catching. Fill in all the required fields like category, size, and condition.

    Step 7: Promote and Engage

    Listing your items is just the beginning. On Poshmark, you need to share your listings regularly. Sharing pushes them back to the top of search results. Aim to share your closet at least once a day. Also, share other people’s items. It builds community and they often share back .

    On Depop, engagement matters too. Follow other sellers, like items, and reply to messages quickly. The algorithms on both platforms reward active users. Consistency is key. Sellers who list a few items every day see much better results than those who list 20 items once a month .

    Step 8: Handle Offers and Negotiations

    Be ready for offers. On Poshmark, buyers can send offers through the app. You can accept, counter, or decline. On Depop, buyers will message you directly. Respond politely, even if the offer is low. A simple “Thank you for your offer, but I can’t go that low. I could do $18” keeps the conversation positive .

    Set a “lowest price” in your head before you start negotiating. This helps you make quick decisions without getting emotionally attached to the item.

    Step 9: Pack and Ship Your Items

    When something sells, do not wait. Pack it carefully. Fold it neatly and place it in a poly mailer or box. If the item is delicate, wrap it in tissue paper. Include a small thank-you note. It is a simple touch that makes buyers happy and can lead to repeat business .

    Print your shipping label. On Poshmark, you print the label they provide. On Depop, you will need to buy a label through a service like Pirate Ship or at the post office. Tape the label securely and drop the package off at the post office or schedule a pickup.

    Ship within one to two days. Fast shipping leads to great reviews.

    Step 10: Leave Feedback and Build Reputation

    After the buyer receives their item, leave them feedback. A simple “Great buyer, fast payment” is perfect. Positive reviews build your reputation. They make future buyers trust you more.

    Over time, as you accumulate five-star reviews, your items will rank higher in searches. Your reputation is your most valuable asset on these platforms. Protect it by being honest, communicative, and reliable.

    Common Mistakes to Avoid

    Many new sellers make the same errors. Avoid these pitfalls to succeed faster.

    • Bad photos: Dark, blurry photos kill sales. Invest time in good lighting.
    • Vague descriptions: Buyers need details. Always include measurements and condition notes.
    • Ignoring fees: Price your items so that fees do not eat your profit .
    • Slow shipping: Buyers expect quick dispatch. Ship within two days.
    • Poor communication: Reply to messages promptly. It builds trust.

    Is It Worth It?

    Absolutely. Selling clothes online teaches you valuable skills. You learn about photography, writing, customer service, and shipping. Plus, you earn real money. Some sellers turn it into a full-time business. Even as a casual side hustle, it can easily pay for a night out or help you save for something special.

    Remember the story of Maria, a teacher who started selling her old Zara pieces and made over $3,000 a month by treating it like a real business . Or Trent, who hit $200,000 in sales his first year by being consistent and treating reselling like a job . You may not hit those numbers right away, but with effort, you can absolutely build a profitable side hustle.

    Conclusion

    Learning how to sell your old clothes on Depop or Poshmark is a skill that pays off again and again. Every time you clean out your closet, you have new inventory to sell. The process is simple: photograph, list, sell, ship. With practice, you will get faster and better at it.

    For more resources on managing your side hustle income and balancing work with school, be sure to visit evdrivetoday.com. We have guides to help you succeed financially.

    Now, we want to hear from you! Have you tried selling on Depop or Poshmark? What was your first sale? Drop a comment below and share your story with our community.